
Configure Devices and Ports on Digital Exchange Managed Fabric
Cyxtera's Digital Exchange Managed Fabric enables organizations to use Cyxtera’s Digital Exchange, our patented data center network fabric, as their core network, eliminating the lengthy process of building and managing their own colocation network.
It is easy to begin configuring Digital Exchange Port Packs and extend your network via the Digital Exchange Managed Fabric on Command Center. To get started, sign in to your Cyxtera Account and go to Command Center. Then navigate to the rack or Secure Cabinet via the Locations widget or the Infrastructure page and the proceeding display of cages and cabinets. Once on the page for the rack/cabinet containing the Managed Fabric panel, you should see a view with four tabs:
On the Devices & Networking tab, you can quickly see a view of your Managed Fabric panel, alongside standard information such as power usage. In this example, we have yet to define any devices or port groups so let's cover those two elements.
Create and Configure Port Groups
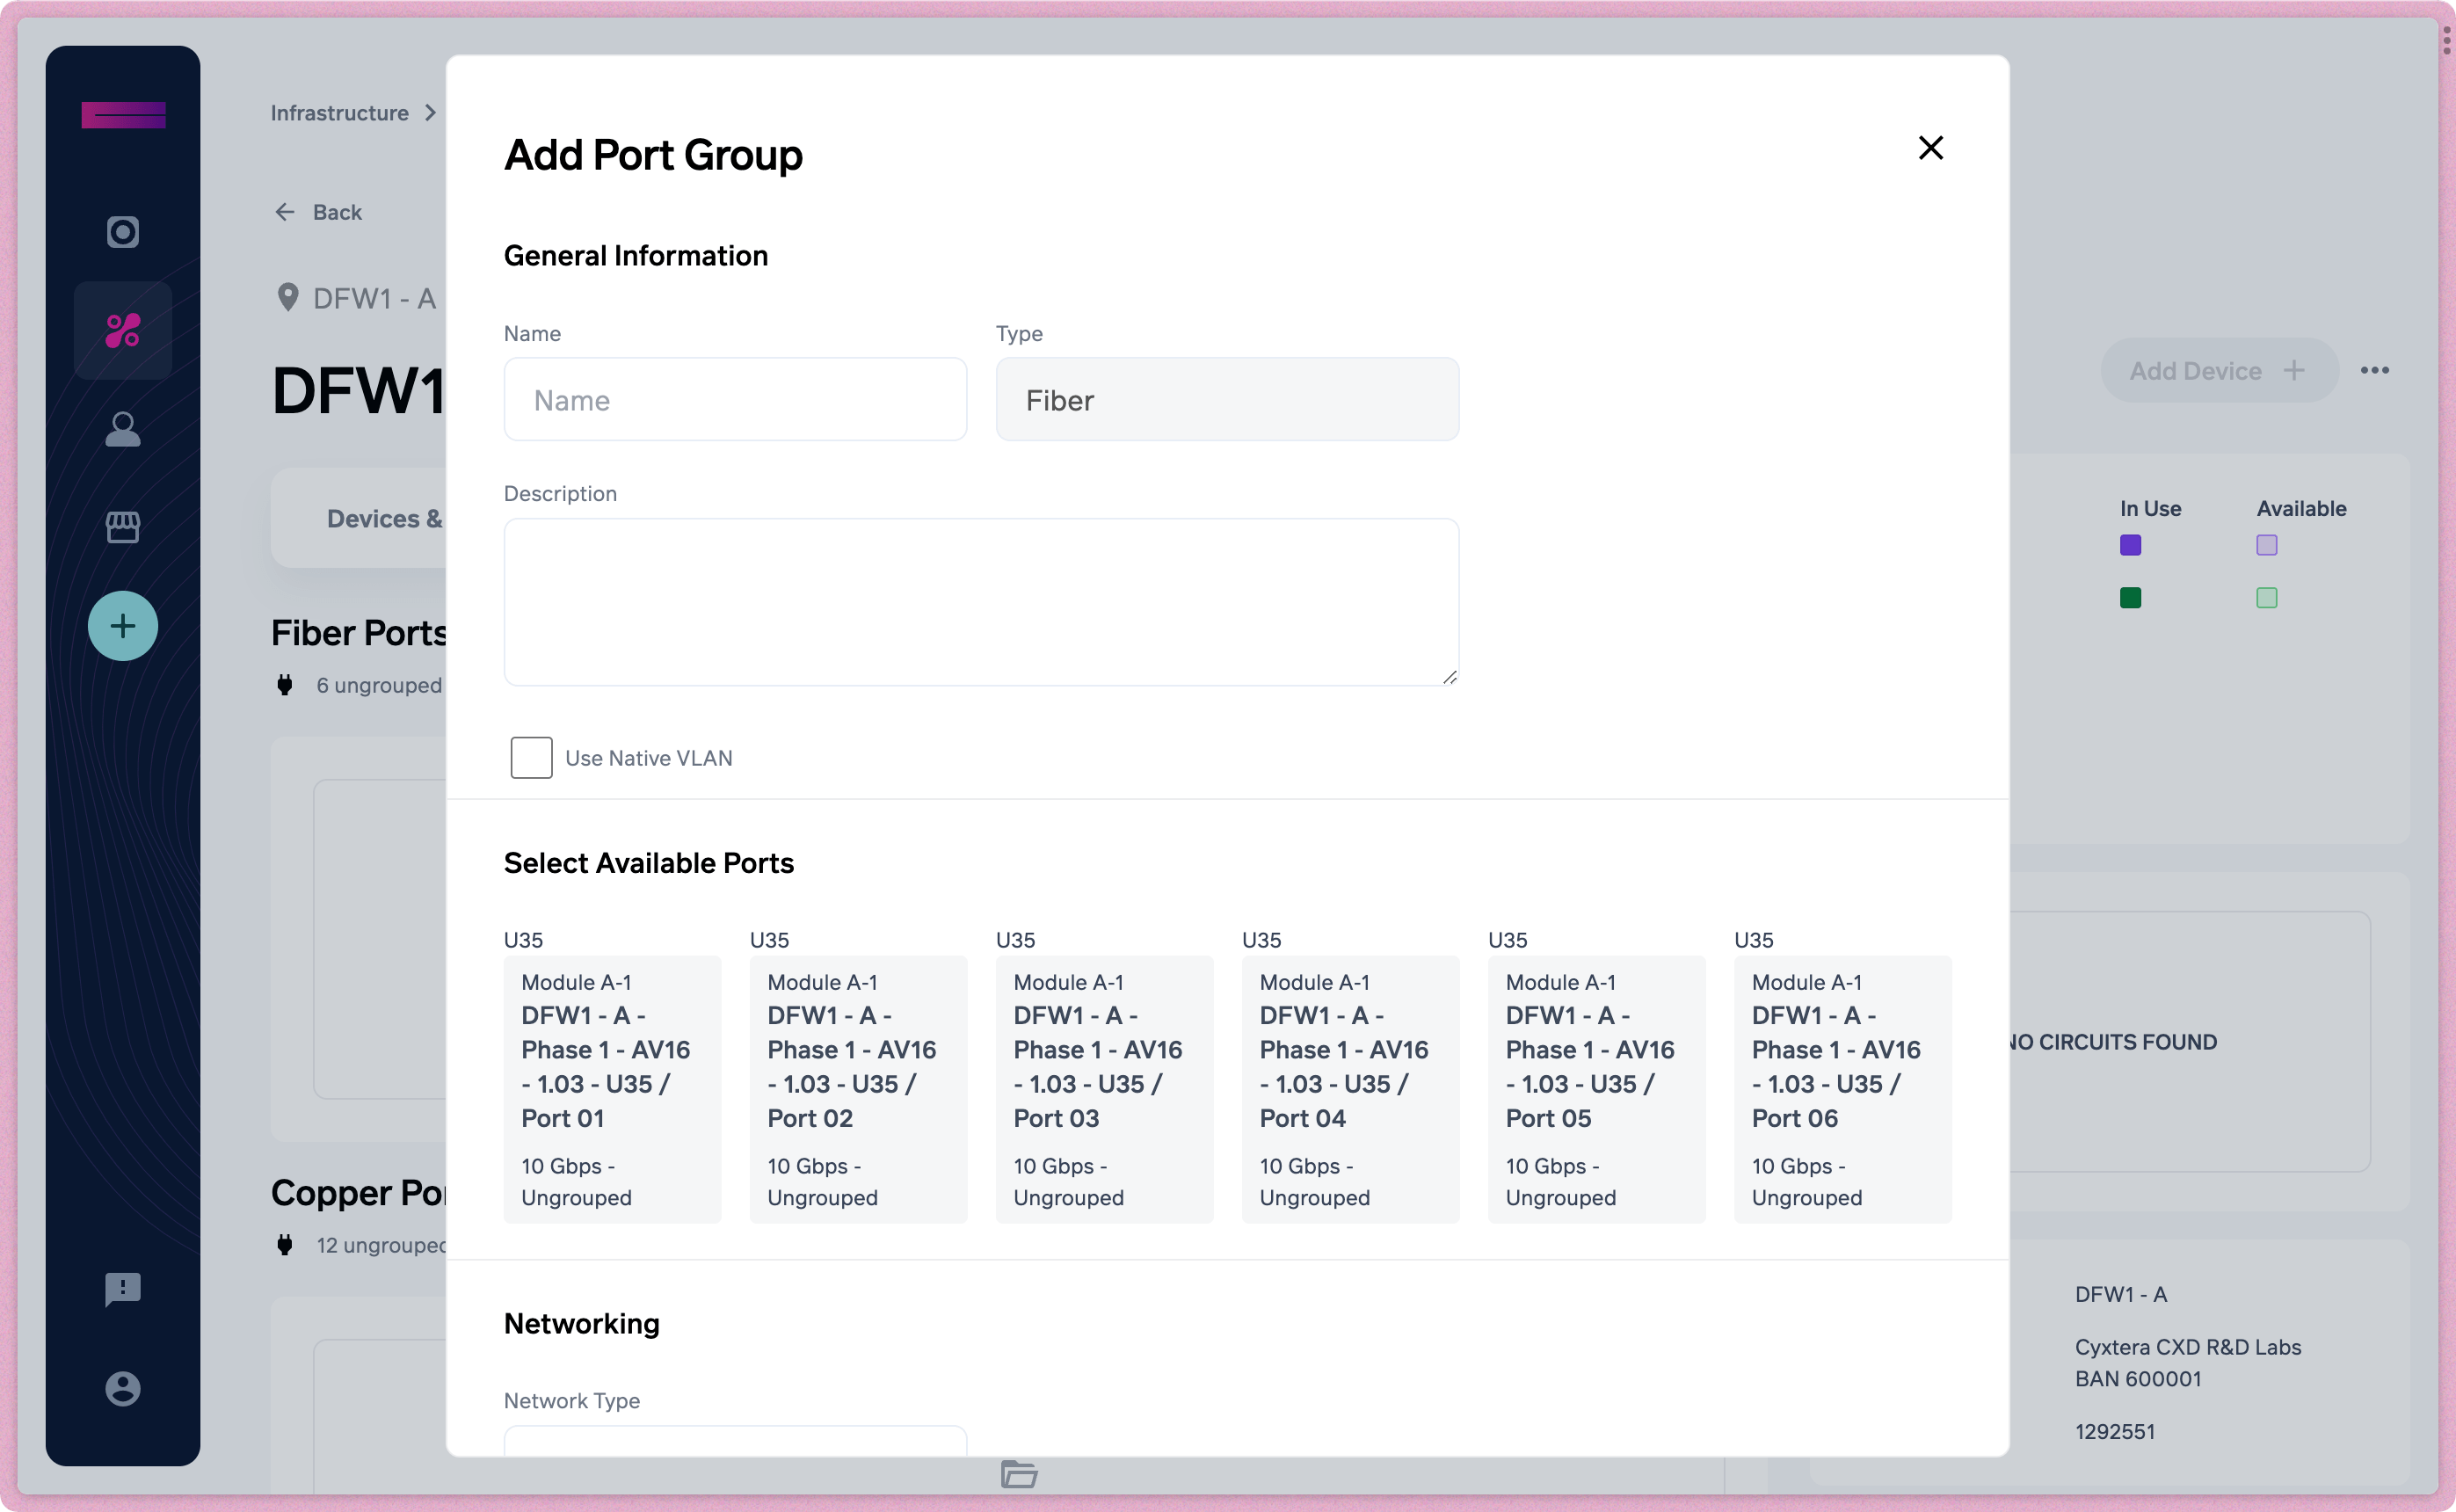
Port groups are a set of ports of the same medium and network configuration. Every port on a panel could have its own port group and individual configuration but, used well, port groups allow us to organize the connectivity of a set of ports logically and manage configuration changes across multiple devices efficiently.
To create a port group:
- Navigate to the "Port Groups" tab and select "Add Port Group" for either the Fiber or Copper medium.
- Give the port group a name and description.
- Under Select Available Ports, choose from the available options.
- Use Networking to select the network type, and under associations, you can choose to bind the port to a virtual network, network trunk group, or an IP Connect network. You can search for a virtual network by name using the search box.
Create and Configure Device
A device is a simple construct allowing you to visualize the connection between equipment installed in a rack and any ports on the device that might be connected to the Managed Fabric panel. It is not necessary to define all equipment in the rack, especially if the equipment in question is not connected to ports on the Managed Fabric panel, however it might be helpful to visualize and track all equipment in the rack.
To add a device, select "Add Device" in the page header and a dialog will be displayed with the requisite fields to add a device. The rack size and position as used to display the devices in an elevation view, accessible by selecting "Show Elevation" above the list of devices.
For the device ports, select the port groups you would like to bind to a port on the device. If desired, add a description to the device port. For example, if the device we wish to add has one copper management port and two fiber ports for primary and redundant connectivity, after creating port groups for the respective Managed Fabric panel ports, we would then select the corresponding copper and fiber ports allocated to the port group.
While configuring a device in the Command Center, it is recommended to physically connect the ports you select from the Managed Fabric panel to the device. Select "Add Device" to finalize the device creation and activate the configurations on each port.

Updated 6 months ago