Set up and manage multi-factor authentication
Multi-factor authentication, or MFA, is a common way of securing online accounts and requires you to perform an additional action during login in order to proceed to your account. For your Cyxtera account, we ask you to enter a 6-digit, one-time passcode (OTP) that’s delivered to a device that only you can access. Our preferred method of delivering an OTP is via an authenticator app.
Using multi-factor authentication is unlikely to be new to you—you probably use it already on other online accounts. But if you don’t currently have MFA enabled on your own or your users’ Cyxtera accounts, we highly recommend you do so. Most data center spaces host business-critical infrastructure or systems, and requiring multi-factor authentication on accounts helps to keep your systems safe from unauthorized access.
Managing MFA on your account
Multi-factor authentication is managed in the Security section of the Account Settings page. To access this:
- Log in to your account.
- Click on your name at the bottom of the navbar, or the chevron next to it, to expand the list of options.
- Click on Account Settings.
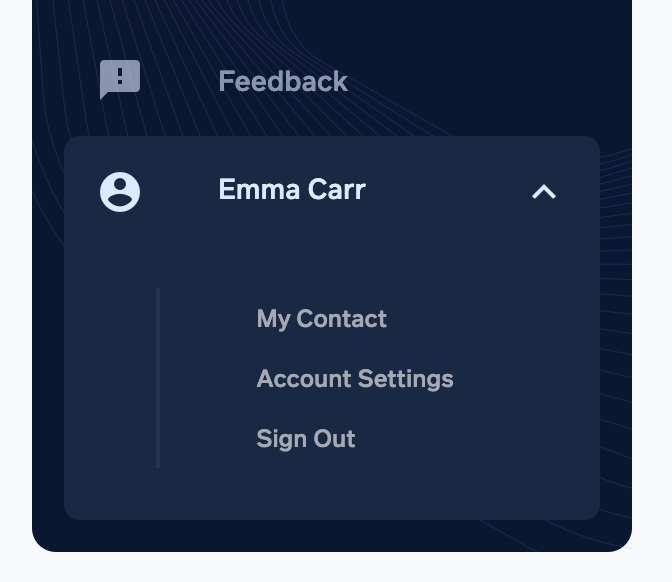
You’ll see Multi-Factor Authentication under the Security heading, with a button to set it up.

You may also be prompted to set up MFA when signing into your account.
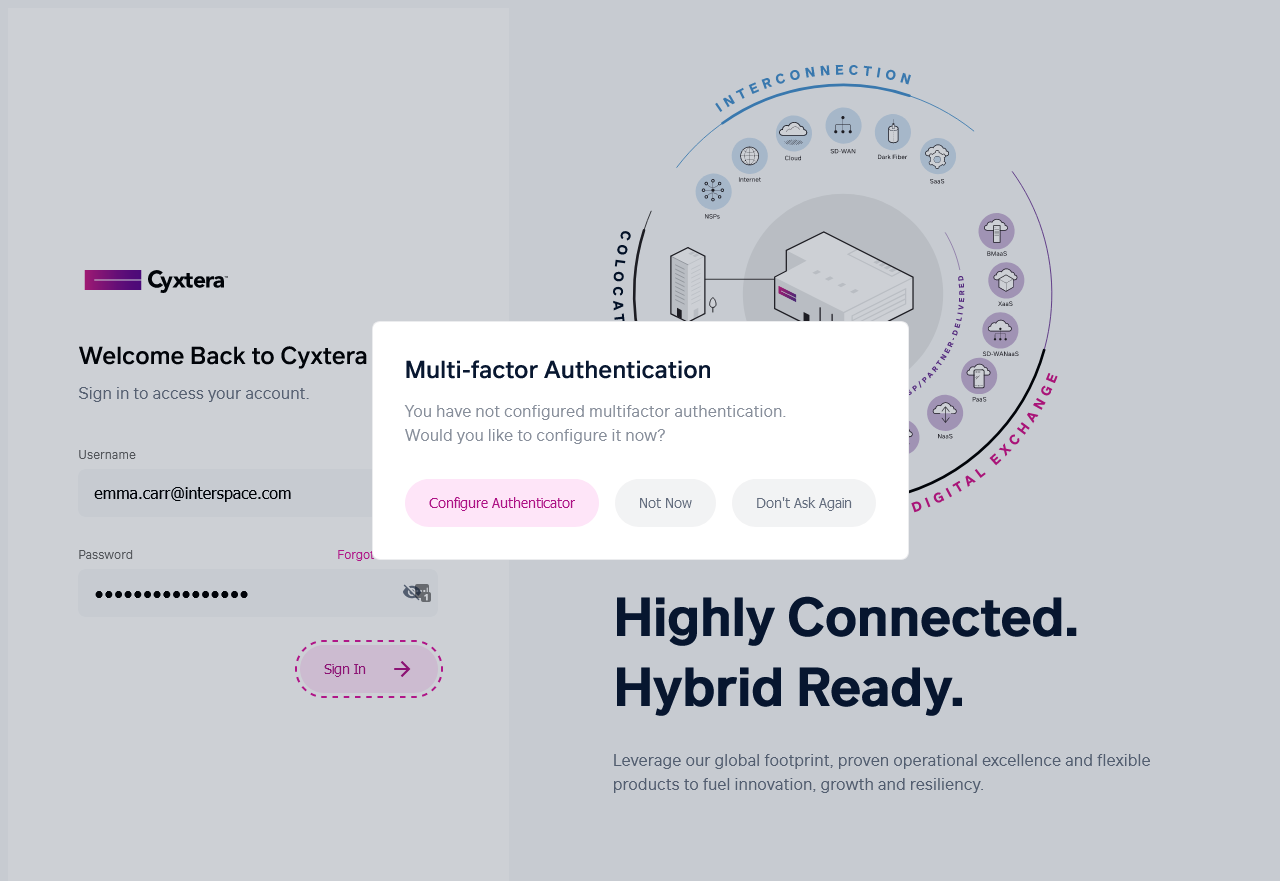
Whether you click on Set Up Multi-Factor Authentication in Account Settings or Configure Authenticator on the login prompt, you’ll then follow the same process to set up your authenticator.
Not Now and Don’t Ask Again
There are two other options on the MFA prompt when you’re logging in.
- Not Now allows you to log in without setting up MFA this time, but this same Multi-Factor Authentication prompt will appear again the next time you log in.
- Don’t Ask Again allows you to login without setting up MFA, and stops this prompt from appearing again. If you later decide you want to set up multi-factor authentication, you can go to the Account Settings page and follow the instructions above to manually start the MFA setup process.
Customer Admins—there’s additional information for you about supporting your users with MFA.
Setting up an authenticator
Cyxtera uses a variety of industry authenticators to deliver one-time codes to you, including Microsoft Authenticator, Google Authenticator, Authy, and 1Password.
- Click on the Configure Authenticator link. The buttons on the Account Settings page and the login prompt both take you to the same process.
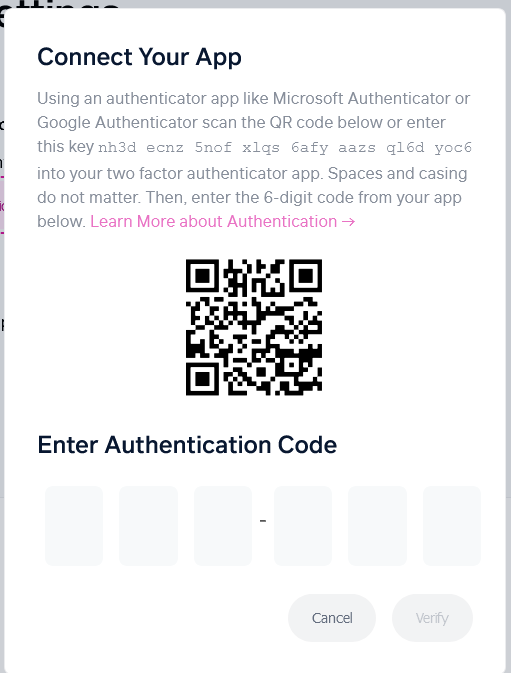
- Decide on an authenticator app. You’ll need to install it on your device if it isn’t already.
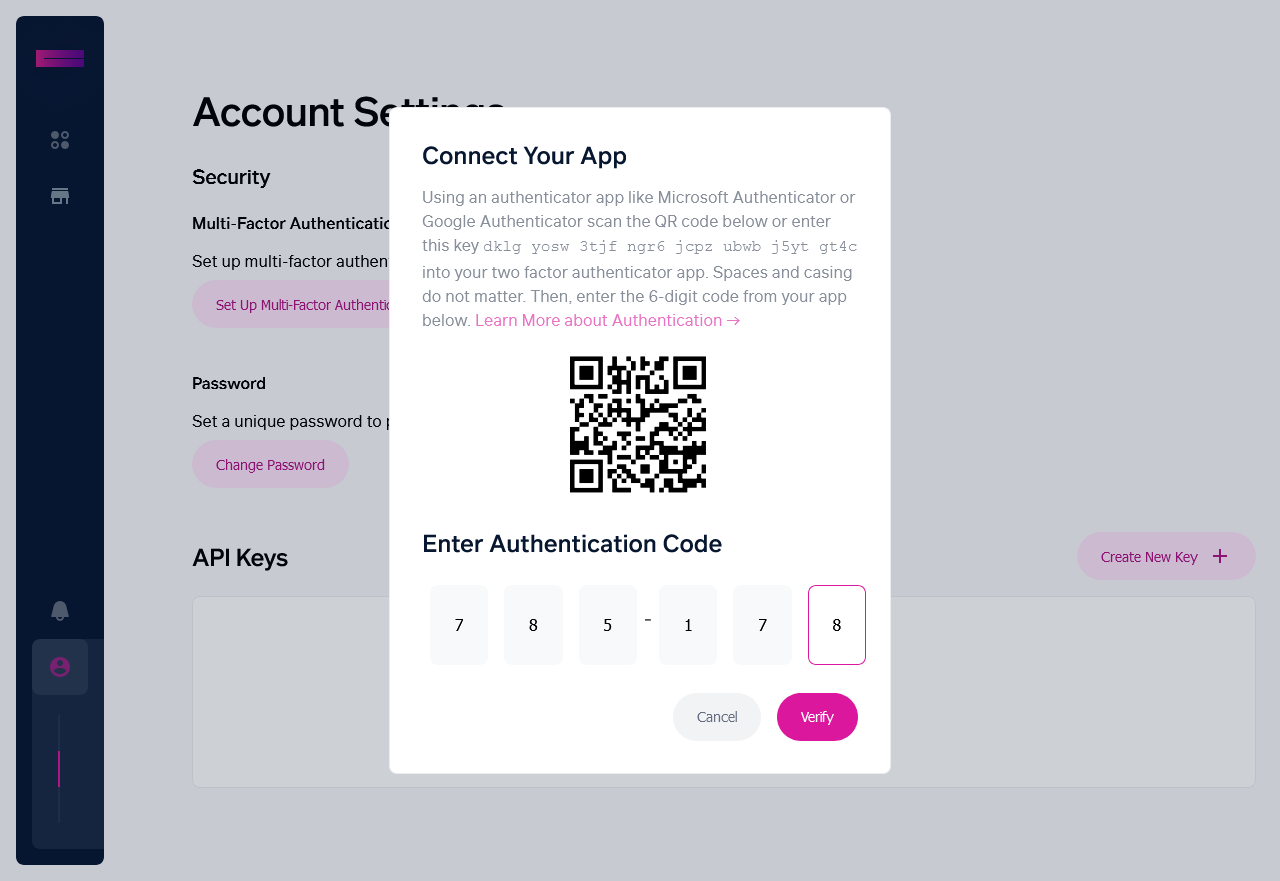
- Open the authenticator app on your device and scan the QR code displayed onscreen. If this doesn’t work, you can alternatively type in the key code provided onscreen.
- Look for the 6-digit code generated for Cyxtera by the app.
[optional generic screenshot of the Google Auth app included in screenshots-screenshotting is disabled for that app on my phone] - Type the code into the portal dialog box and click on Verify. You’ll be logged into your Cyxtera account.
Recovery Codes
The first time you log in using MFA, you’ll be shown an onscreen prompt with four 6-digit recovery codes. These are pre-generated one-time codes that enable you to successfully navigate multi-factor authentication even if you don’t have access to your usual authenticator. You should therefore keep them safe and accessible, but secure.
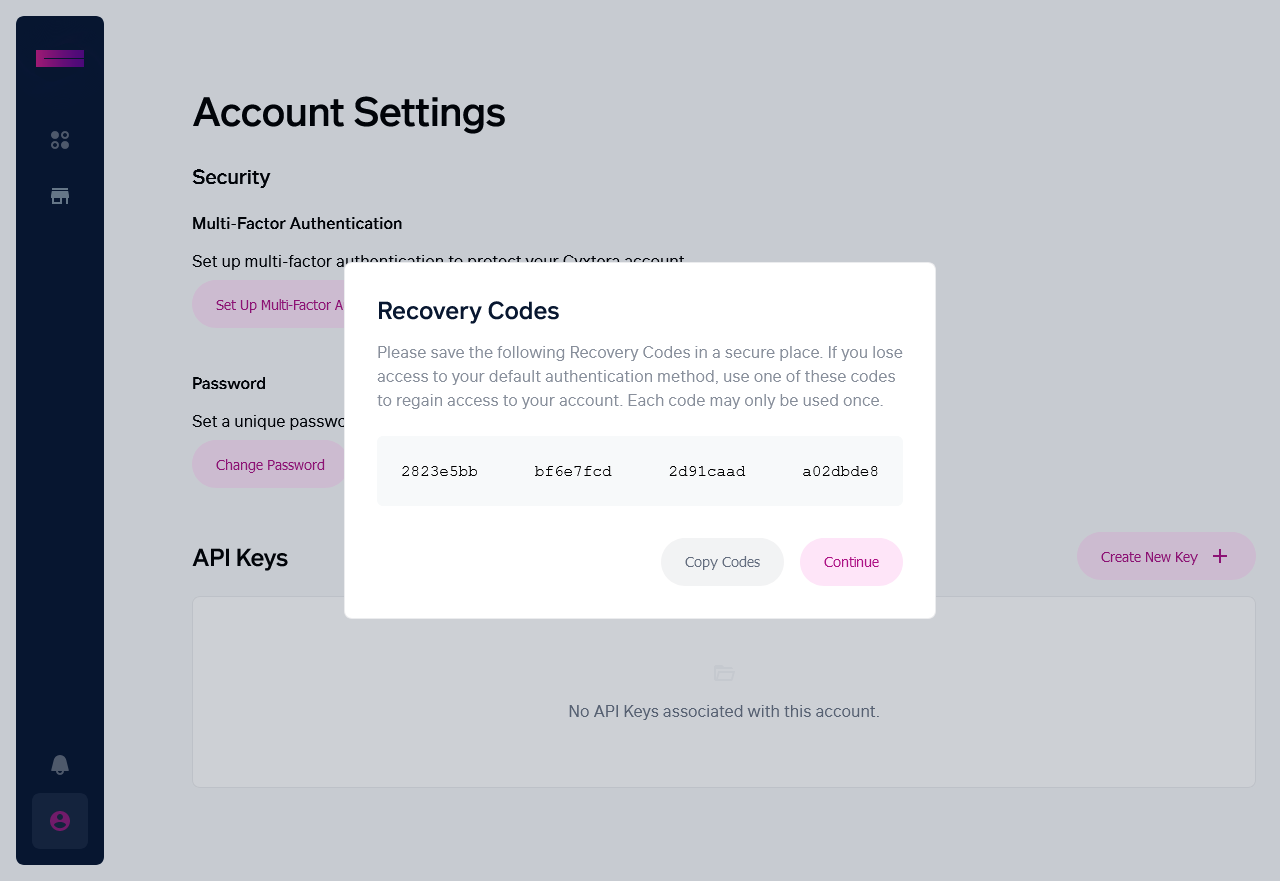
To use a recovery code:
- Enter your username and password as usual.
- When prompted to enter your 6-digit verification code, instead click on Reset My Authenticator in the bottom left of the dialog box.
- Enter an unused recovery code when prompted.
Each recovery code can only be used once but you can generate a new set of recovery codes at any time. The Regenerate Recovery Codes button, under Multi-Factor Authentication in Account Settings, becomes available once you’ve successfully set up MFA.
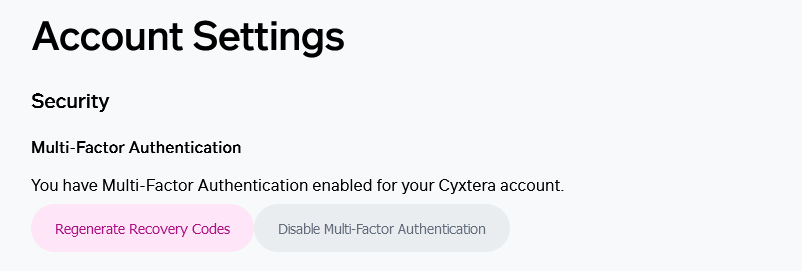
Regenerating recovery codes will reset any existing unused recovery codes, so make sure you delete these from your safe place, and replace them with the new codes.
Disabling MFA
You can turn off multi-factor authentication in your account at any time. This will return you to a simplified login requiring only a username and password.
- Go to Account Settings page.
- Click on the Disable Multi-Factor Authentication button under the Security heading.
- Re-enter your account password to confirm.
Disabling multi-factor authentication in the Cyxtera portal doesn’t necessarily delete the Cyxtera account in your authenticator. If you re-enable multi-factor authentication in the future, you may need to replace the existing Cyxtera account in your authenticator by scanning a new QR code, or entering a new key code.
Supporting your users with MFA
As a Customer Admin, you can support your users with multi-factor authentication, saving them and you the time and effort of calling in to Cyxtera customer support.
Currently you’re able to disable multi-factor authentication for any of your users that have set it up, which should remedy any issues they’re having. To re-enable MFA, the user simply sets it up again themselves using the instructions above. In the future, we plan to release additional options, including the ability to force users to use MFA on their accounts.
Disabling multi-factor authentication for a user
This is a security feature, managed on the individual’s Contact page.
- Go to the Contacts page for your BANs, by clicking on Contacts in the navbar.
- Scroll to the user you’re looking for, or use the Search box to find them.
- Click on their record to open it. If multi-factor authentication is enabled on their account, you’ll see a link option to Disable MFA, in pink under Manage Contact.
- Click on the link and click Yes to confirm you wish to disable multi-factor authentication for this user.
The user can now log in with just username and password. They can set up multi-factor authentication again themselves at any time.
Updated about 1 month ago