
Activate Enterprise Bare Metal Nodes
Enterprise Bare Metal Nodes can run as standalone points of presence or extend your colocation infrastructure. Discover how to configure their management and connectivity.
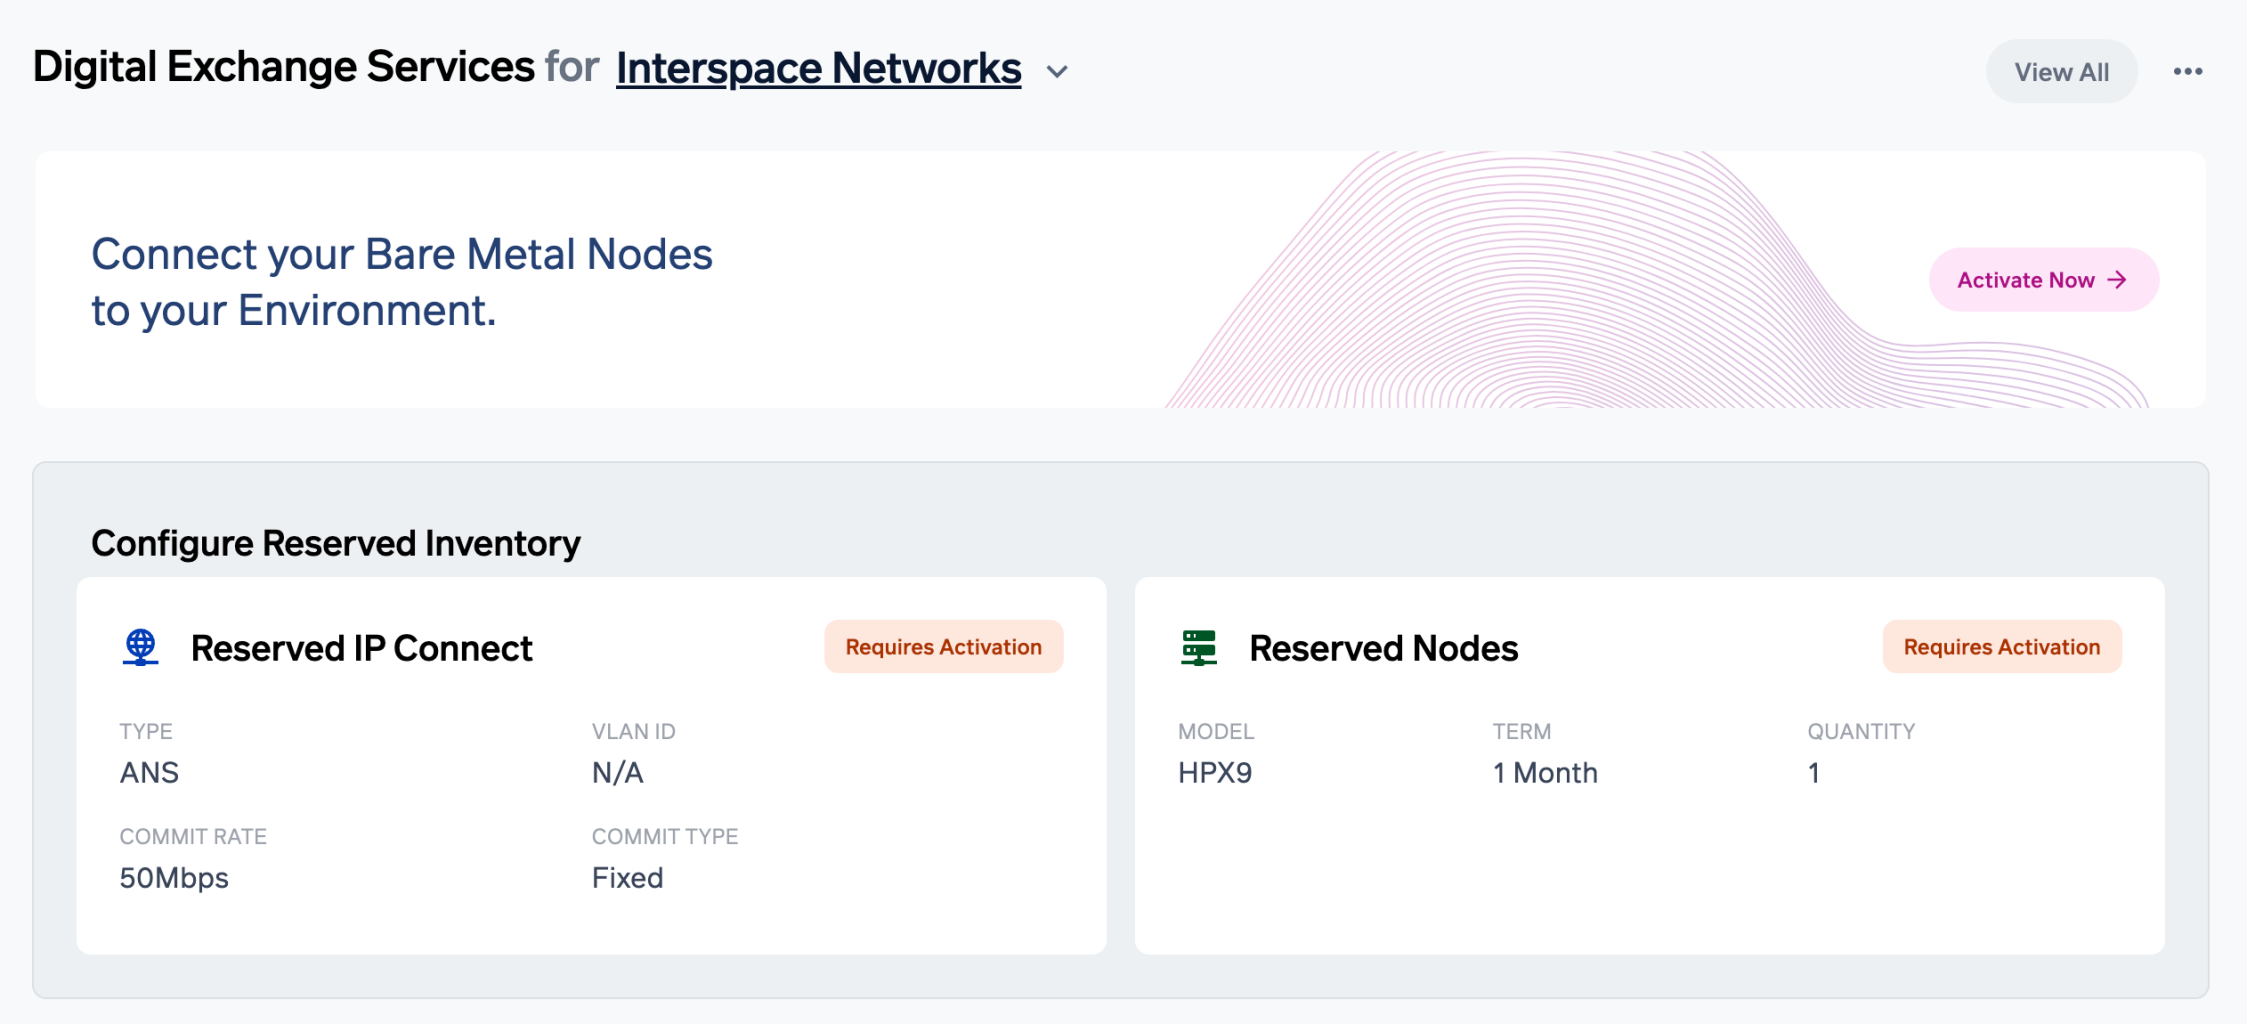
When you order Enterprise Bare Metal nodes, we’ll show you a banner in the Command Center to invite you to set them up. The process walks you through a simple configuration wizard, which includes preselected values where possible to streamline configuration.
To activate your bare metal nodes, follow these steps:
- In the Command Center, go to the location dashboard and click the Activate Now button on the activation banner.
- Define Group: Give the nodes you are activating a group name. You can enter a new name or select the name of an existing group. Group names are used to manage networking between nodes. Although we use the term “group,” a group can contain a single node. You can go through the activation process multiple times to activate nodes in separate groups.
- Choose whether you want to use these nodes as standalone nodes, or as a Nutanix HCI Cluster. A cluster must include at least three nodes.
- Select Nodes: By default, we select all your unactivated nodes, as shown in the table at the bottom. You can remove nodes if you don’t want to activate them now in this group. You can only activate nodes of the same type at the same time. You can’t, for example, activate HPE ProLiant and NVIDIA DGX systems in one go.
The next step is to set up the connectivity. This part of the process is slightly different depending on whether you’re using IP Connect or an Exchange Port.
Set Up Connectivity: IP Connect
IP Connect is ideal if you want to use your nodes as a standalone point of presence, and do not want to connect them to existing colocation infrastructure.
- Activate IP Connect: If you have ordered an IP Connect service, you can name it and activate it here. If you already have an IP Connect service activated, you can select it from a dropdown menu in the IP Connect Name field.
- Specify the VLAN: The VLAN can be used to connect your nodes to services on Digital Exchange. You can connect your nodes to an existing VLAN if you have one, or set up a new one. We’ll prepopulate the form with a suggested valid number for a new VLAN.
- Configure IP Connect Private Network Address and Size: The IP Connect Private Network has IP addresses you can use to access the nodes once you have accessed the network. You can add these nodes to an existing network, or set up a new network. We suggest valid default values for the network address and network size.
- Enter IPMI Credentials: Your IPMI credentials are used to manage your nodes remotely. You can, for example, install an operating system, shut down a node, or install new firmware. You enter usernames for the operator and admin roles, and we will automatically generate passwords. Uncheck the auto-generate boxes if you’d like to enter your own passwords.
- Configure DHCP: Use DHCP to automatically generate IP addresses for nodes on the network. Enter the start and end IP addresses, the lease duration, and the optional DNS settings.
- Configure DNAT: Use Dynamic Network Address Translation to block access to the nodes unless access requests come from your authorized IP addresses. Enter an authorized IP address (such as your office address) and network size, and click Add to add them to the table.
- Select Activate. You’ll see a confirmation that your connection was successful, and your nodes will be available to use in a few minutes.
Set Up Connectivity: Connect to Exchange Port
If you are extending your existing colocation infrastructure with these nodes, connect them to an Exchange Port.
- Activate Exchange Port. If you have ordered an Exchange Port, you can name it and activate it here. If you already have an Exchange Port, you can select it from a dropdown menu in the Exchange Port Name field.
- Select the networking type. See our guide to Exchange Port configuration options.
- Leave auto-negotiate selected to have the port speed automatically determined. You can uncheck this box and manually configure the port speed.
- Leave enable monitoring selected, and we can show you the status of your exchange port in Command Center.
- Specify the VLAN. The VLAN can be used to connect your nodes to services on Digital Exchange. You can connect your nodes to an existing VLAN if you have one, or set up a new one. We’ll prepopulate the form with a suggested valid VLAN number.
- Enter IPMI Credentials. Your IPMI credentials are used to manage your nodes remotely. You can, for example, install an operating system, shut down a node, or install new firmware. You enter usernames for the operator and admin roles, and we will automatically generate passwords. Uncheck the auto-generate boxes if you’d like to enter your own passwords.
- Select Activate. You’ll see a confirmation that your connection was successful, and your nodes will be available to use in a few minutes.
Updated 12 months ago