
Order IP Connect with BGP
Use your own IP Addresses with IP Connect and advertise your service using Border Gateway Protocol (BGP).
Our IP Connect with BGP service enables you to use Border Gateway Protocol (BGP) to advertise your IP address, making it discoverable to other systems, including carriers, on the internet. IP Connect with BGP allows you to bring your own IP addresses to your Cyxtera digital exchange infrastructure. IP Connect supports IPv4 and IPv6 addresses.
Order IP Connect with BGP service
To set up an IP Connect with BGP service, follow these steps:
- Sign in to Command Center.
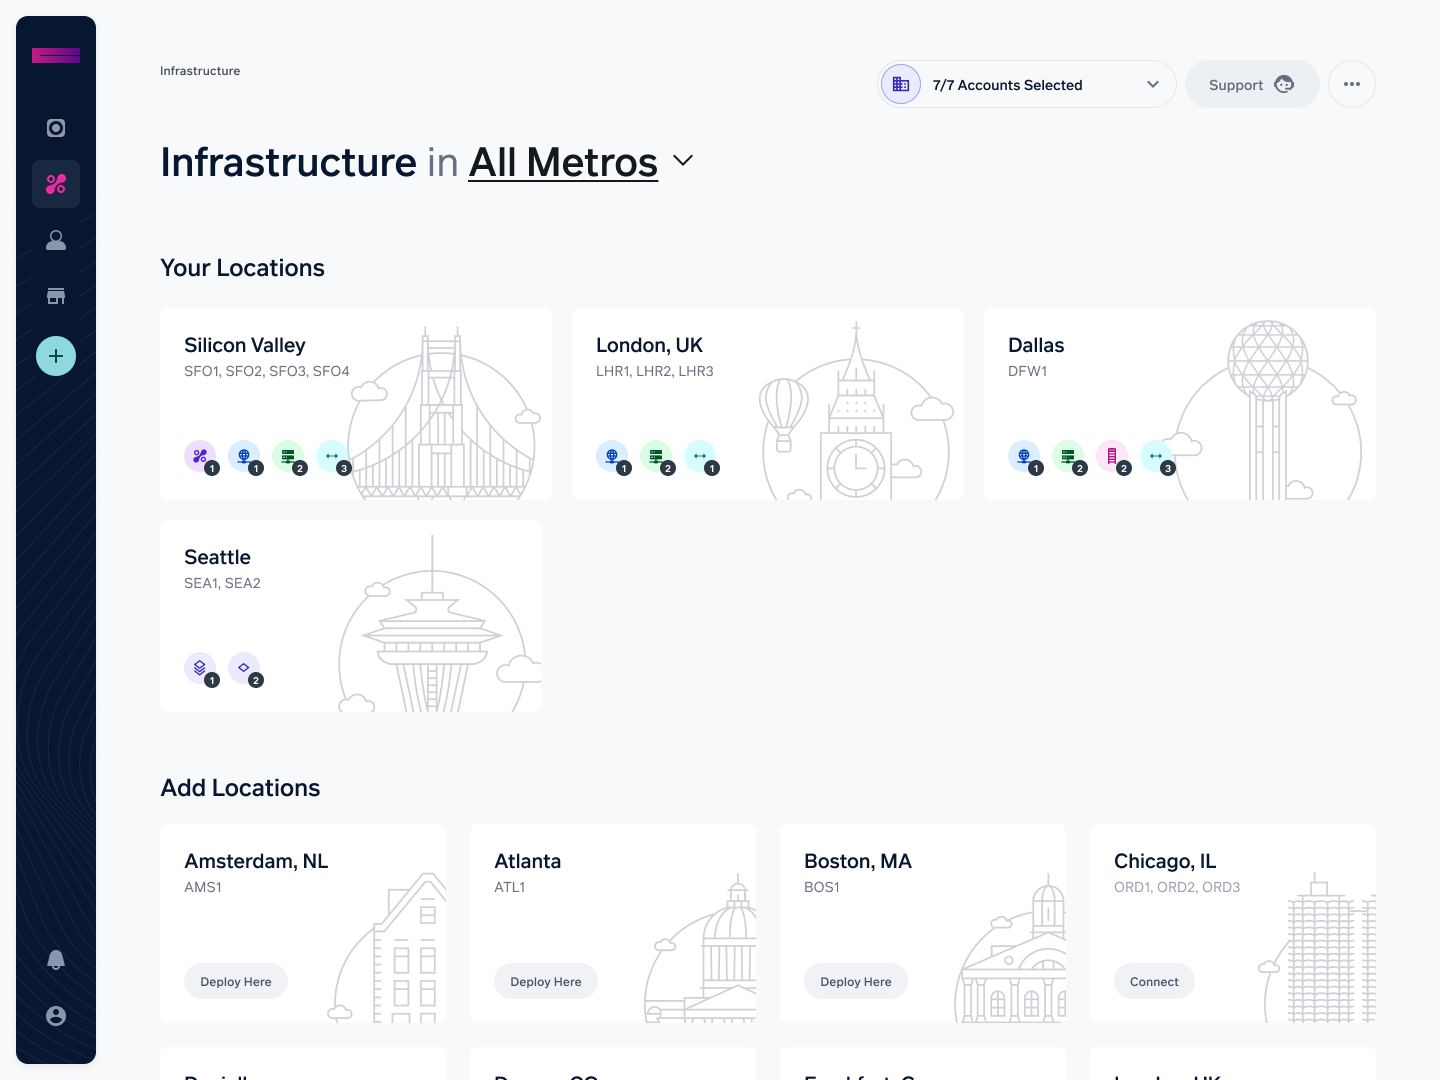
- On the navbar on the left, select Infrastructure.
- Choose one of your locations, shown at the top of the screen.
- You now see the Digital Exchange services in your chosen location. Where it says IP Connect, you can see your existing IP Connect services. If you have ordered an IP connect service from your account rep, you’ll see it here, labelled as “reserved”. Select the reserved IP Connect to begin activation. In this guide, we’ll assume you have not already ordered a service and you are setting up a new IP Connect service through the Cyxtera portal.

- On the right, select Order IP Connect.
- On the Order IP Connect screen, select IP Connect + BGP as the connection type. We have separate guides if you want to set up IP Connect Standard or IP Connect + ANS.

- Complete the general information for this service:
- Name: Enter a name that will help you to identify this connection.
- VLAN: This must be a number from 1 to 4094 that is not already associated with a VLAN in your account. The VLAN number is used to identify your VLAN and route traffic through it.
- Public ASN: You can provide your own Autonomous System Number (ASN) or leave this blank to use Cyxtera's ASN, 12213.
- Advertisement Type: Select a route advertisement type here. You can choose between Full Routes, Default Routes, and Full + Default Routes. Full Routes gives you greater control over your traffic policy. Full + Default Routes gives you that control, while still enabling you to use Default Routes where you do not have an explicit route preference.
- MD5 Auth Key: Enter an authentication key which we can use to encrypt our BGP traffic going to your router. This is optional and prevents man-in-the-middle attacks.
- Commit rate: Choose the maximum bandwidth of this IP Connect instance, from 10 Mbps to 5 Gbps. If you choose Fixed, the IP Connect service will be rate limited to your chosen bandwidth. If you choose Burstable, your traffic can burst up to 1Gbps for bandwidth tiers up to 500 Mbps and can burst up to 10 Gbps for higher tiers. Additional charges apply for traffic above your chosen tier.

- Configure the IPv4 and IPv6 addresses you wish to advertise. IP Connect supports bringing your own IPv4 or IPv6 blocks, as well as purchasing space from Cyxtera. For IPv4, a /29 to a /24 CIDR block is supported so long as the block is from Cyxtera's pool. You will also be assigned an IPv6 address.
Enter each address into the box, select its network size, and click the Add button. As shown in the image below, each IP address range you add goes into the box underneath the form fields. You can click the remove icon beside an address range to delete it. The network size is set using Classless Inter-Domain Routing (CIDR) blocks. The minimum block size for IPv4 is /24 and the minimum block size for IPv6 is /56.

- Choose which of your compute nodes or Digital Exchange Ports you would like to bind this IP Connect service to. The form shows your ports and compute nodes that are available in this location. If you select a port or compute node in error, click it again to deselect it.

- Select Submit Order under your Order Summary on the right.

- You must confirm that you have the right to use the IP addresses provided and that you will follow Cyxtera’s acceptable use policy.

- You should see a confirmation that your order has been submitted successfully. Cyxtera will validate the ownership of the IP addresses before approving the order for processing. During this time, it shows as “Pending” when you visit this location in the Digital Exchange. When it’s ready, it is shown as “Installed”. Carriers may take up to 24-48 hours to accept adjustments to the routing protocols.

Updated 10 months ago