Simplifying interconnections and shipments
With our recent updates to Cyxtera Portal, we’ve made it easier to find information about your interconnections and shipments. These changes follow customer requests and are part of our ongoing work to refine the user experience of Cyxtera Portal.
Clearer information on interconnections
We’ve reorganized the way we present information on interconnections, so our portal can more quickly surface what matters most to you.
Our previous structure was organized around ports. That was potentially confusing when redundant connections were used on two ports. You were able to navigate from the port to the service, but the service could be running across two ports. To find an interconnection you had to navigate to the appropriate network panel first.
Now, the portal is organized around the interconnections, so it better reflects how you buy and use the services. You can go to an interconnection without needing to know where it is on the network panel.
Here’s a quick tour:
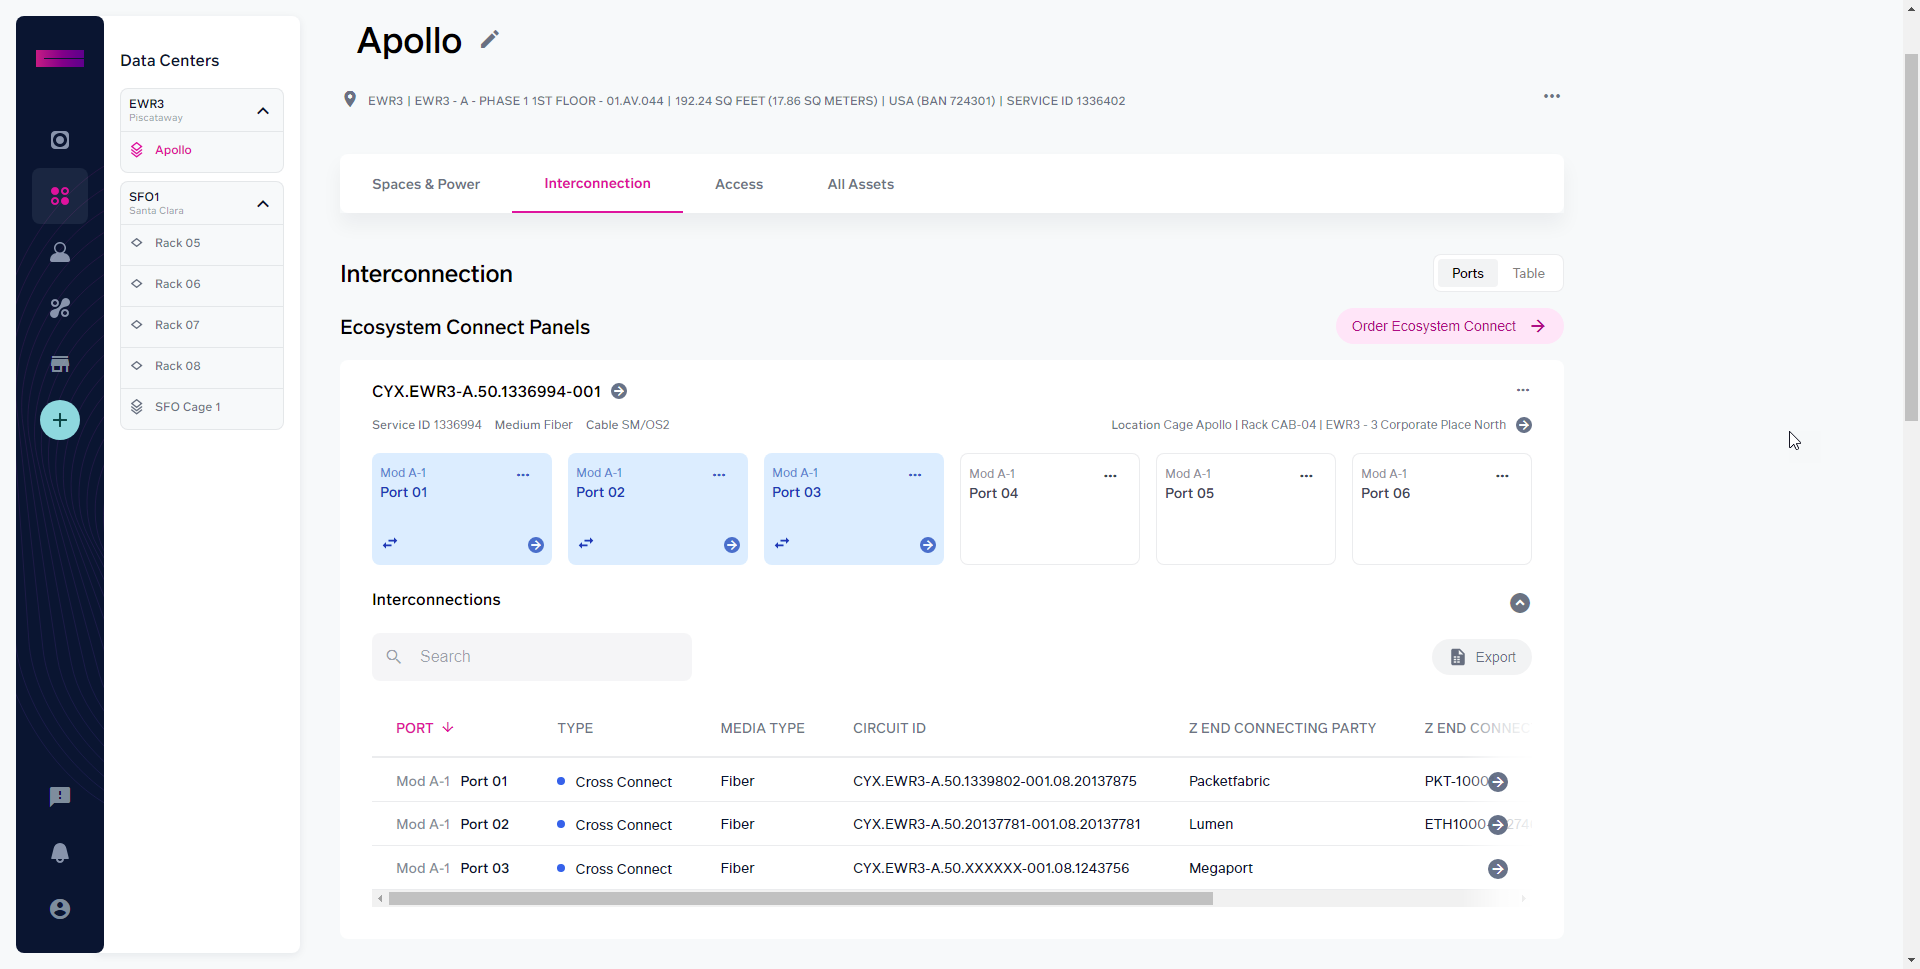
- From one of your Spaces, click Interconnection. You see the overview of interconnections, with Ecosystem Connect Panels at the top and Network Panels further down the page, as shown here:

- You can use the horizontal scrollbar to see more information about the interconnections.

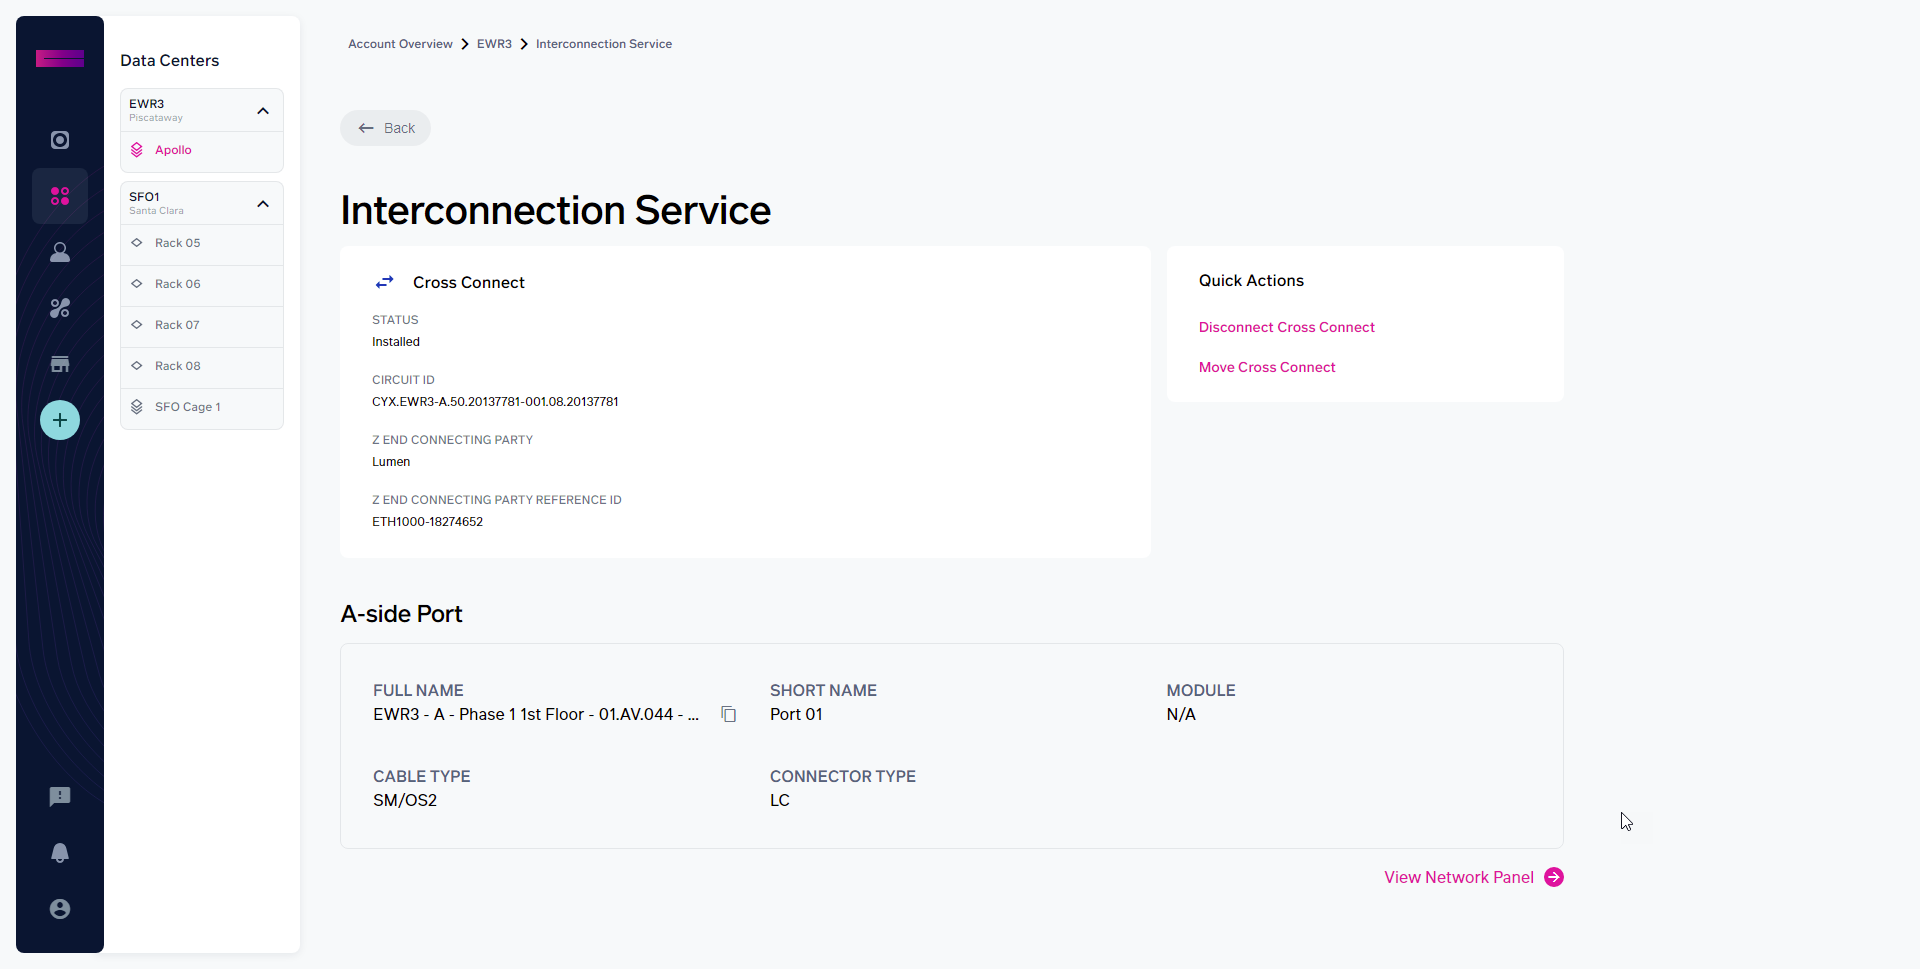
- Click one of the interconnections to see its Interconnection Service page, which looks like this:

- To view information on the associated network panel, click the View Network Panel button in the bottom right.
Improved Shipment pages
We’ve redesigned the Shipment pages. Previously the Work Notes were at the top of the screen, and information on tracking numbers and packages was in the sidebar. It could require a lot of scrolling to find this information, and it was easily overlooked.
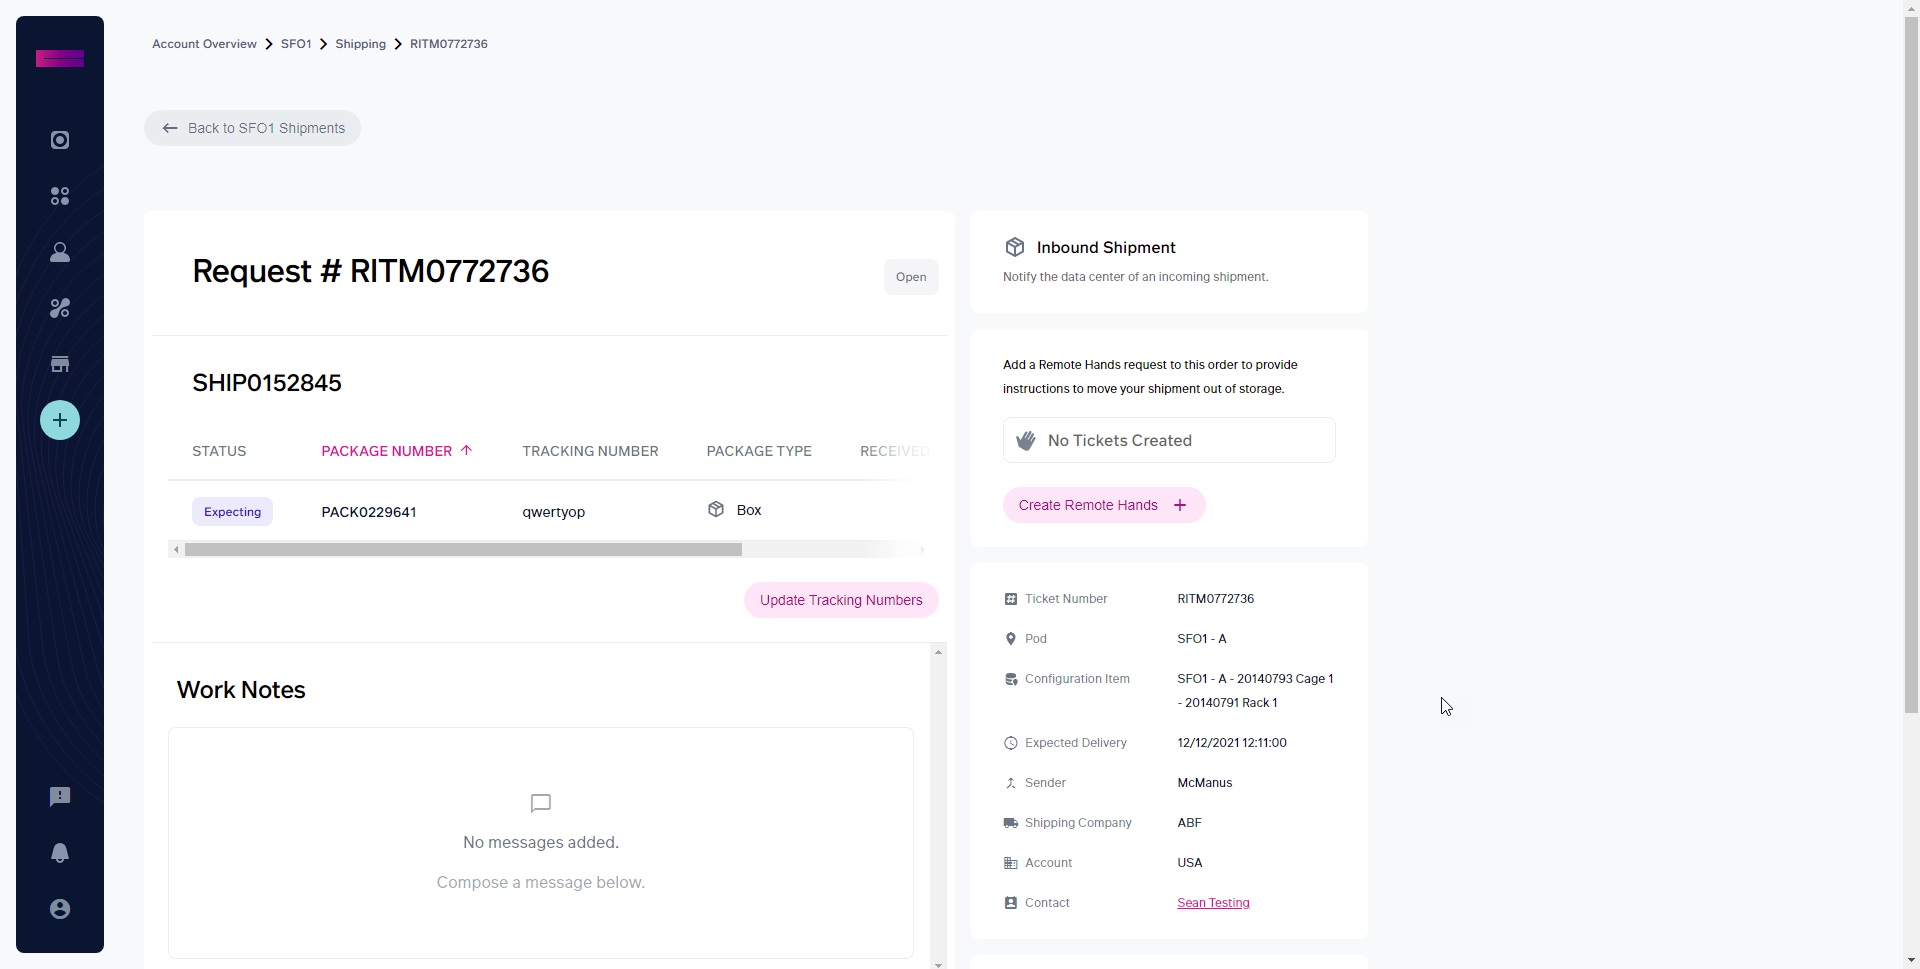
Now, the Shipment page has a clear hierarchy, showing the request number, the shipment information, and the packages that make it up. If the tracking information changes, the Update Tracking Numbers button is easy to find underneath the table showing the packages. The Work Notes, which are mostly automatically generated, are still available further down the page.
Here’s a quick tour:
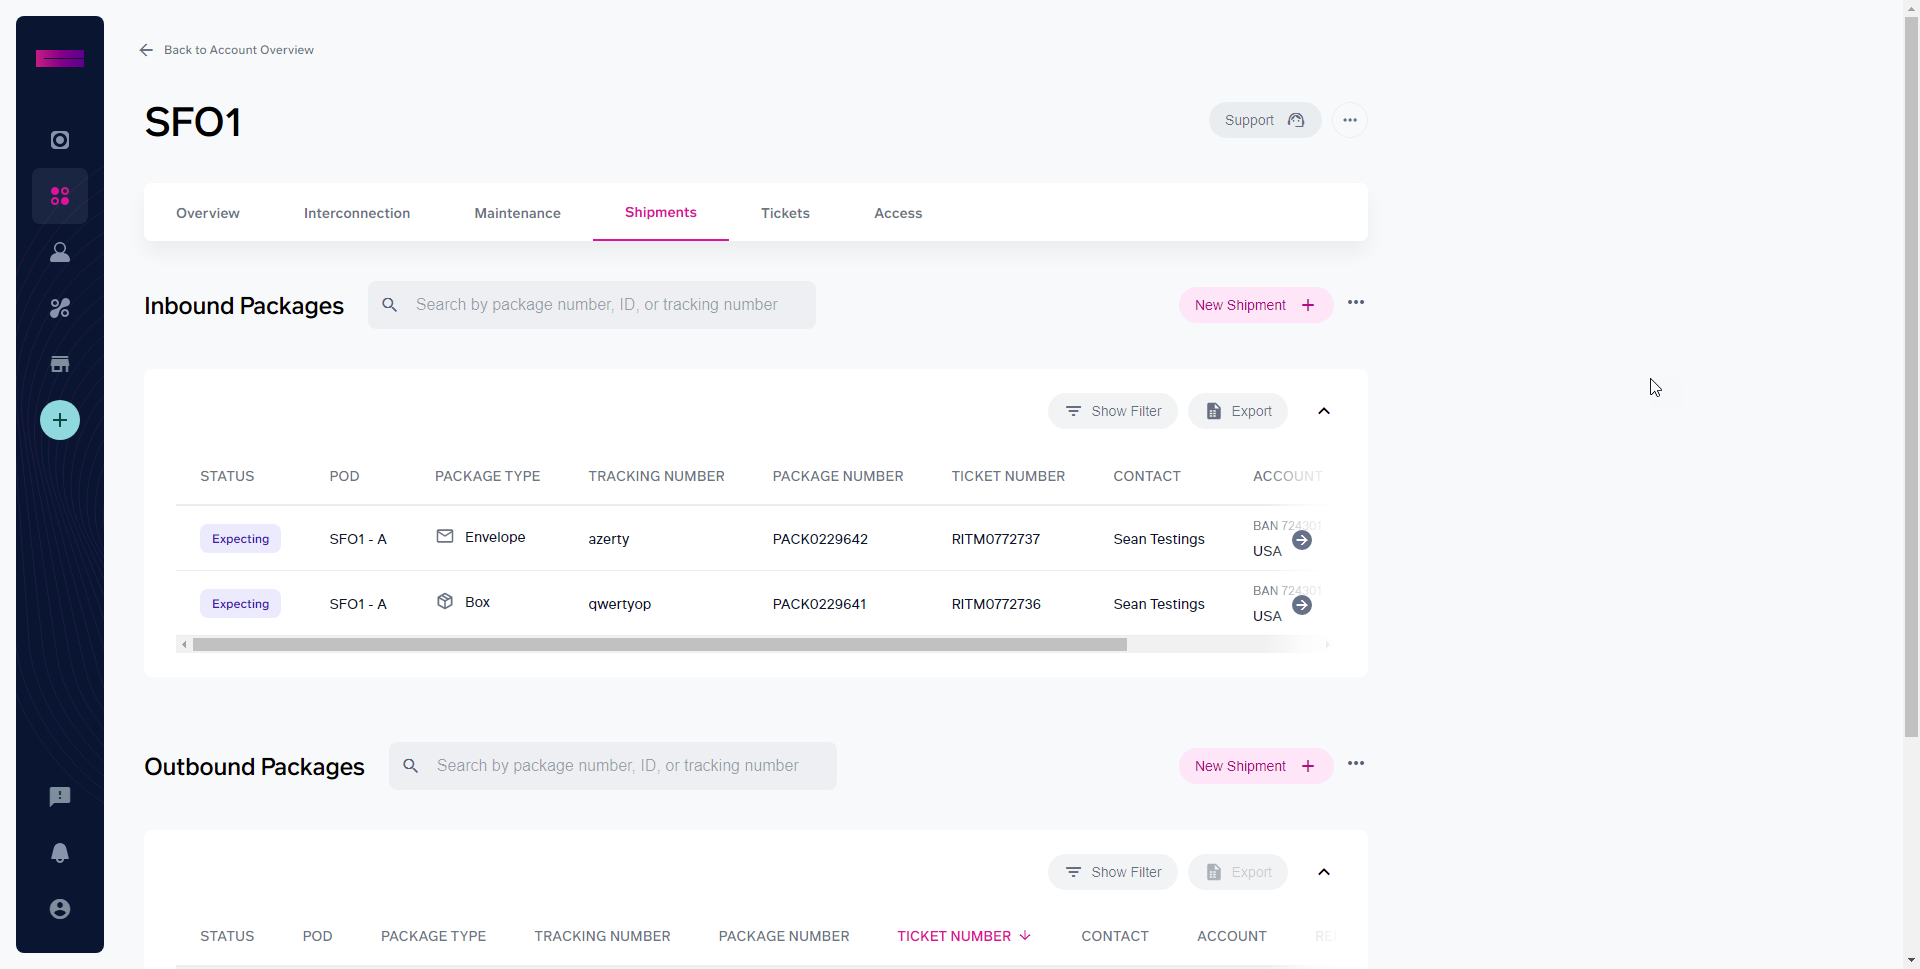
- From your data center, click the Shipments tab. You see an overview of inbound and outbound shipments:

- For more information on a shipment, click it in the table to see its detail page, which looks like this:

- From here, you can see detailed information about the shipment, update the tracking numbers, or create a Remote Hands request relating to the shipment.