added
Easier account recovery and persistence of account selection
almost 3 years ago by Scott Smith
Selected BANs now persist across sessions and customer admins can better help users with account recovery.
BANs now persist across sessions
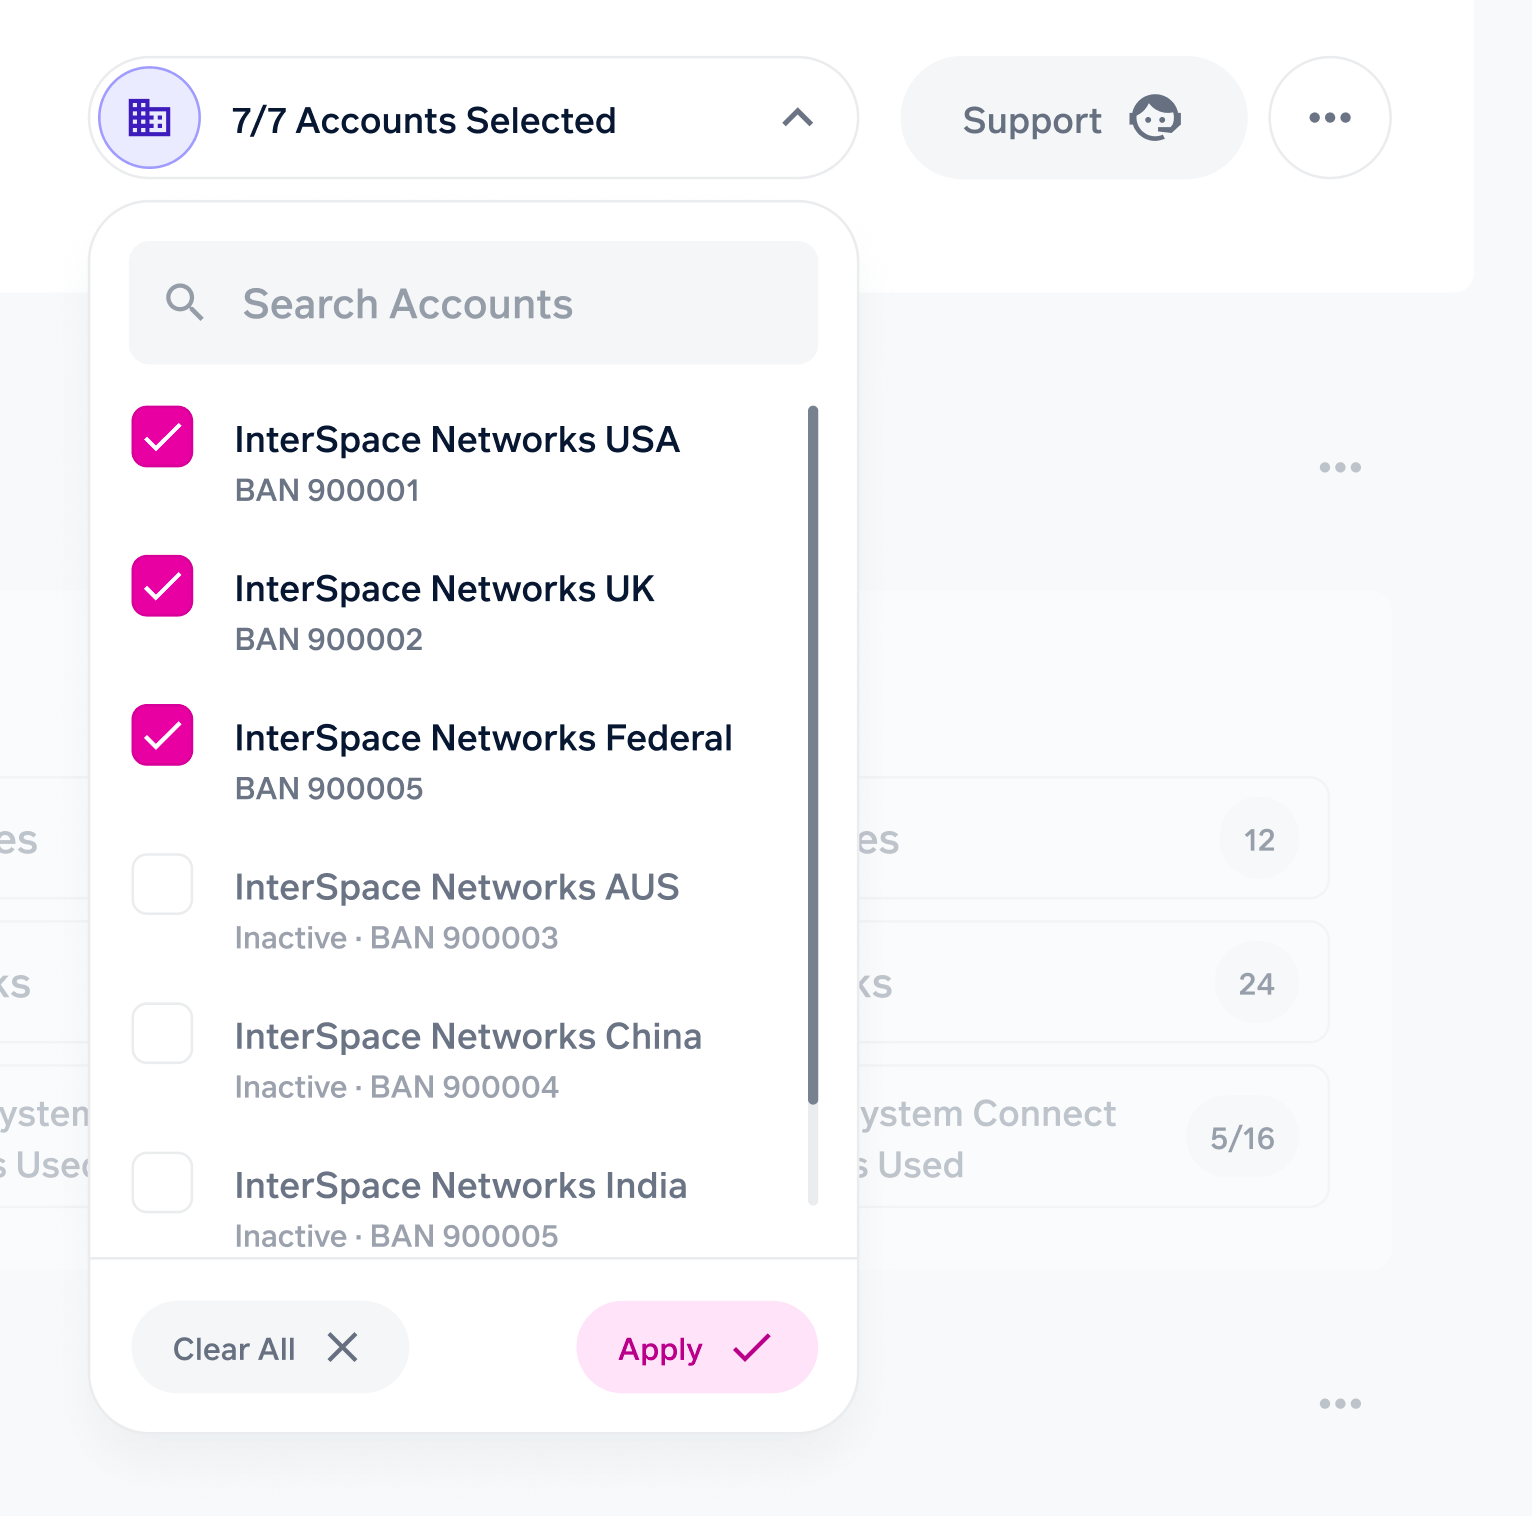
On the Overview page, portal users can choose which Billing Account Numbers (BANs) they want to see in the portal.
All your BANs are selected by default. To change the BANs you see, click the Accounts Selected option at the top of the Overview page, and then uncheck those you do not wish to see. Click Apply.

You could use this to show only the BANs that are relevant to your work, geography, or business division, for example. This choice now persists across sessions and across all your devices, so you only need to make your choice once.
New options for account recovery
Customer admins have two new ways to help Cyxtera Portal users with account recovery:
- Send a password reset email from within Cyxtera Portal. This helps users who have forgotten their password. Although users can reset their own passwords, they sometimes turn to customer admins for help with this.
- Turn off multi-factor authentication (MFA). This helps users who cannot access the portal because they don’t have the phone used for authentication available.
Follow these steps:
- Log in as a customer admin.
- Select Contacts on the navbar on the left.
- Find the Contact you wish to reset the password for. You can browse or use the search.
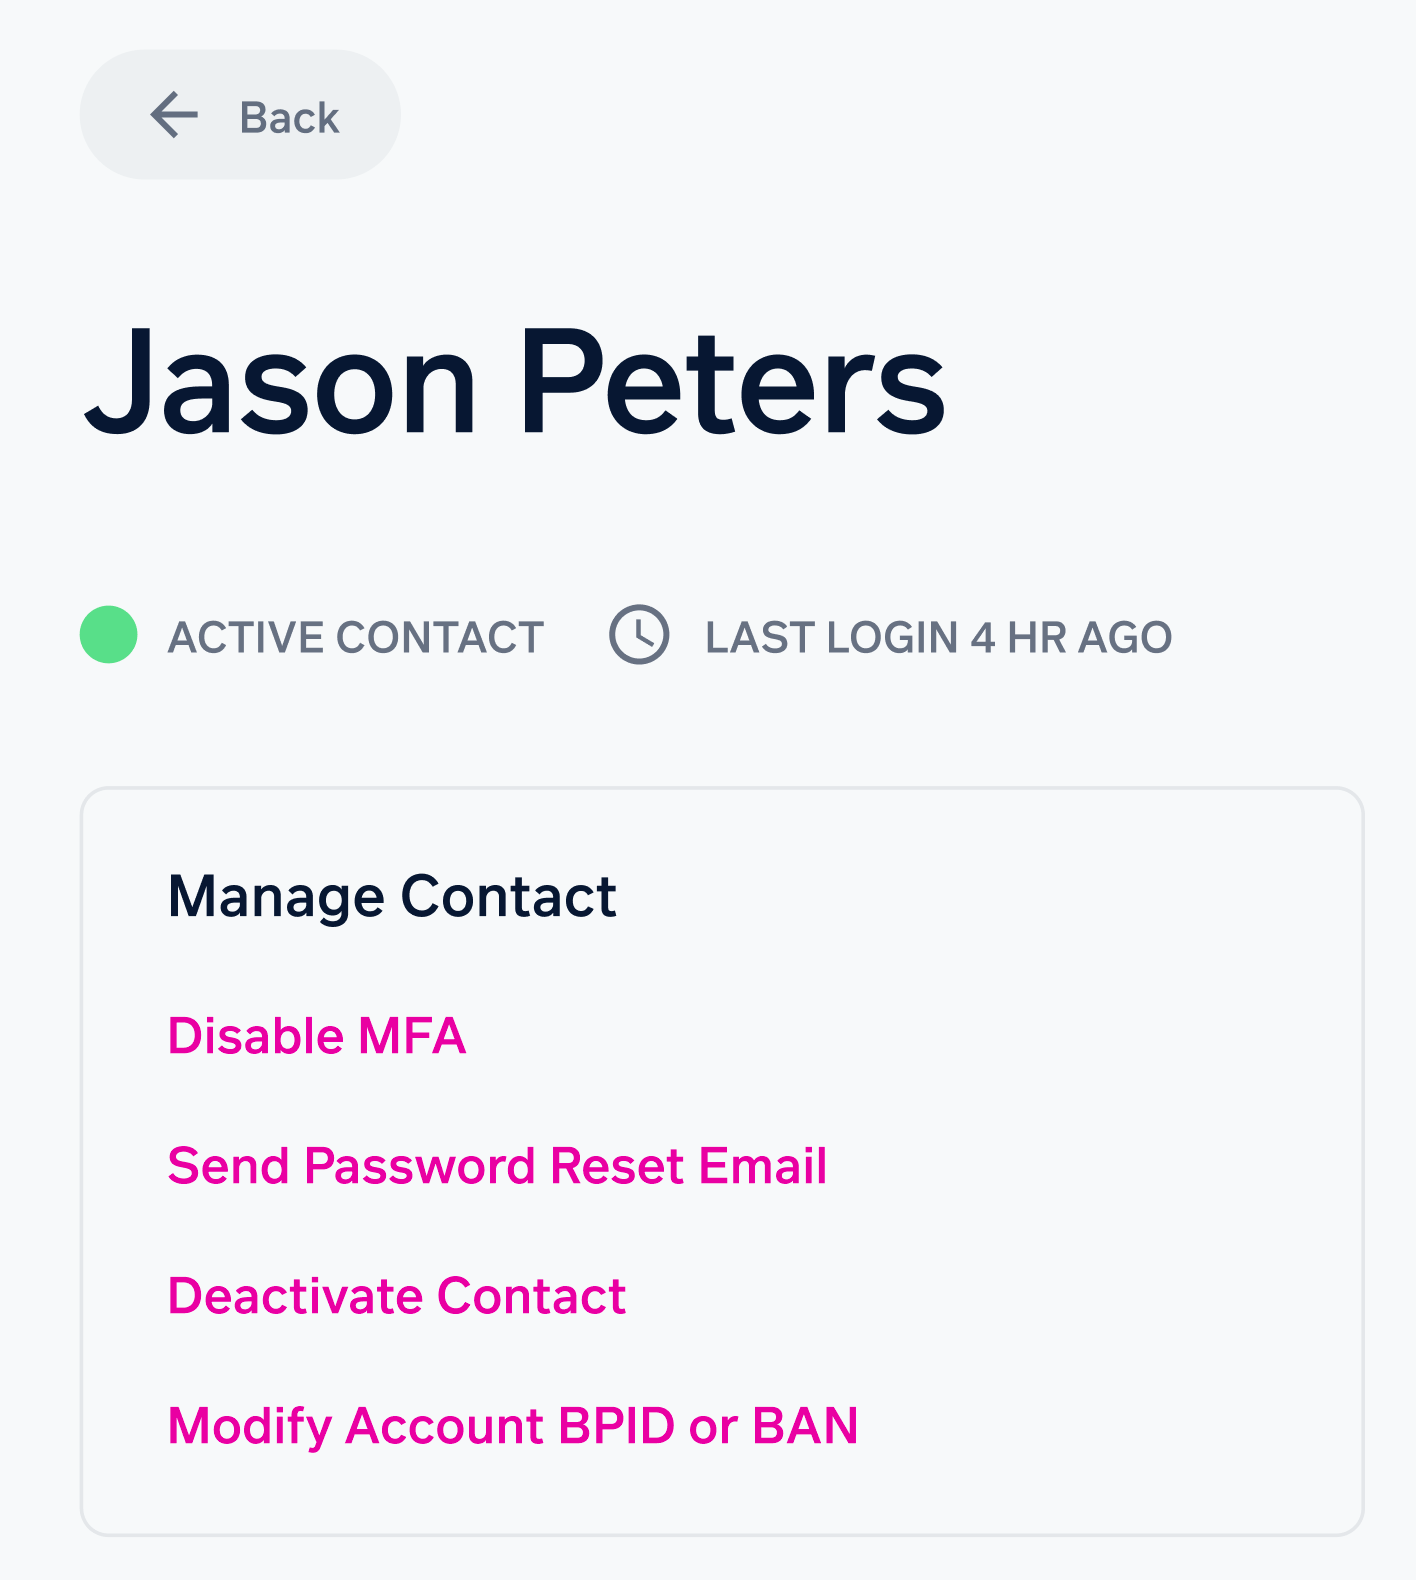
- Select the contact’s details. You’ll see the contact’s profile, including the Manage Contact box at the top which has options for managing the user account:

- In the Manage Contact box at the top of the screen, you can click Send Password Reset Email. To confirm, click Send Reset. The Contact will receive an email they can use to reset their own password.
- In the Manage Contact box, there is also an option you can click to Disable MFA. To confirm, click Disable MFA in the “Are you sure?” dialog box. The Contact can now log in without using multi-factor authentication. They will be prompted when logging in to set up multi-factor authentication again if they want to. At any time, they can enable multi-factor authentication by clicking the profile icon in the bottom left, clicking Account Settings, and then choosing to Set Up Multi-Factor Authentication. Find out more about multi-factor authentication here.